Instagram favours vertical shots set at 4 x 5 ratio which show well on your phone screen. But what if you have a terrific landscape shot? You don’t want a tiny horizontal photo!
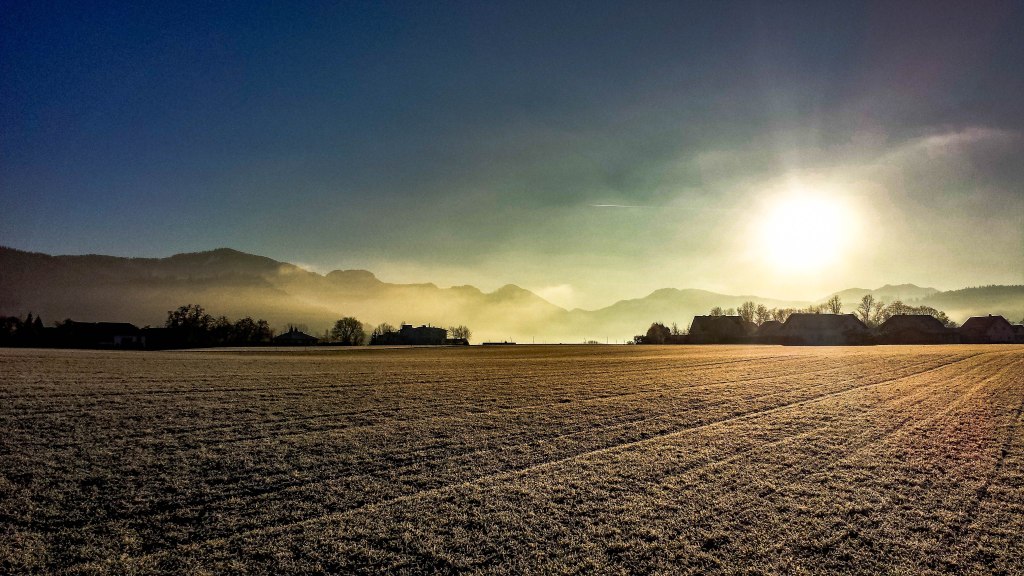
Here’s one editing technique that allows you to create two or three continuous panoramic shots. I use Photoshop, but it should work if you can set ratios on your editing app or program. This is the method I used for the above panoramic shot of frosty Austrian fields posted on Instagram as bestholidayspots2:
- Open up Photoshop or your editing app.
- Decide if your landscape-shaped photo would look best as two or three shots. Here I decided on two shots which meant that some of the sides, top and bottom of the photo were cropped out.
For two shots:
- Open up your landscape shot. Set your crop ratio to 8 x 5. As 5 is the ratio for the vertical side, this means you have allowed for two side-by-side shots at 4 x 5 ratio.
- Choose your most interesting horizontal section, then crop this photo and save this shot as a jpeg labelling it 8 x 5. Close the shot but DO NOT save the changes to your original image.
- Open up the 8 x 5 jpeg. Set your crop to 4 x 5, then move the crop outline so that the section from the left border to the middle of the photo is outlined, then crop. Save this shot as 4 x 5 left and DO NOT save the changes to the 8 x 5 image. You might also like to reduce the 4 x 5 left image in size for Instagram. I save mine as 800 wide x 1000 high. I then save this final left crop as 4 x 5 left insta.
- I then open up the 8 x 5 jpeg again and repeat the process for the right side of the shot.
- When you load the two photos on Instagram, they will magically morph into one continuous shot.
For three shots:
When you have more information that you want to keep from your landscape-shaped photo, you might decide on three shots in your Instagram panorama.
- First, open up your shot. Set the cropping ratio to 12 x 5, then work out what you most want to keep in your shot, then crop it. Save this shot as a jpeg labelling it 12 x 5. Close the shot but DO NOT save the changes to your original image.
- Open up the 12 x 5 jpeg. Set your crop to 4 x 5, then move the crop outline so that the section from the left border to the middle of the photo is outlined, then crop. Save this shot as 4 x 5 left but DO NOT save the changes to the 12 x 5 image. You might also like to reduce the 4 x 5 left image in size for Instagram. I save mine as 800 wide x 1000 high. I then save this final left crop as 4 x 5 left insta.
- Then open up the 12 x 5 jpeg again. The crop outline will naturally choose the centre of the shot. Repeat the process for the middle side of the shot and save as middle. Then repeat the process for the right hand side of the shot.
After you have finished one panoramic shot, it gets faster! Good luck!